

Ein Meeting erstellen
Hintergrund
Mit dem Tool Meetings können Sie detaillierte Tagesordnungen für Ihre Projektbesprechungen erstellen. Der erste Schritt im Prozess ist die Erstellung des Meetings. Auf diese Weise können Sie das Datum, die Uhrzeit, den Standort und die Teilnehmer festlegen. Dieser Vorgang wird in den folgenden Schritten beschrieben. Sobald die Besprechung erstellt ist, können Sie mit der Erstellung von Kategorien fortfahren, die verwendet werden, um Tagesordnungspunkte in Themen zu gruppieren. Anschließend können Sie die einzelnen Tagesordnungspunkte zu Ihren Kategorien hinzufügen.
Wichtige Hinweise
-
Die Besprechung muss sich im Agenda-Modus befinden. Dies ist die Standardeinstellung, wenn Sie eine neue Besprechung erstellen.
Wie Sie eine Besprechung in den Protokollmodus umwandeln können, erfahren Sie unter Konvertieren einer Besprechung in den Protokollmodus.
Schritte
- Navigieren Sie zum Meeting- Tool des Projekts.
- Klicken Sie auf + Meeting erstellen.
- Wählen Sie + Neu oder wählen Sie eine Meeting-Vorlage aus der Liste aus.
- Füllen Sie unter Meeting-Informationen die entsprechenden Felder für das neue Meeting aus.
Hinweis: Wenn keine Startzeit oder Endzeit ausgewählt ist, setzt Procore diese automatisch auf 12:00 Uhr.
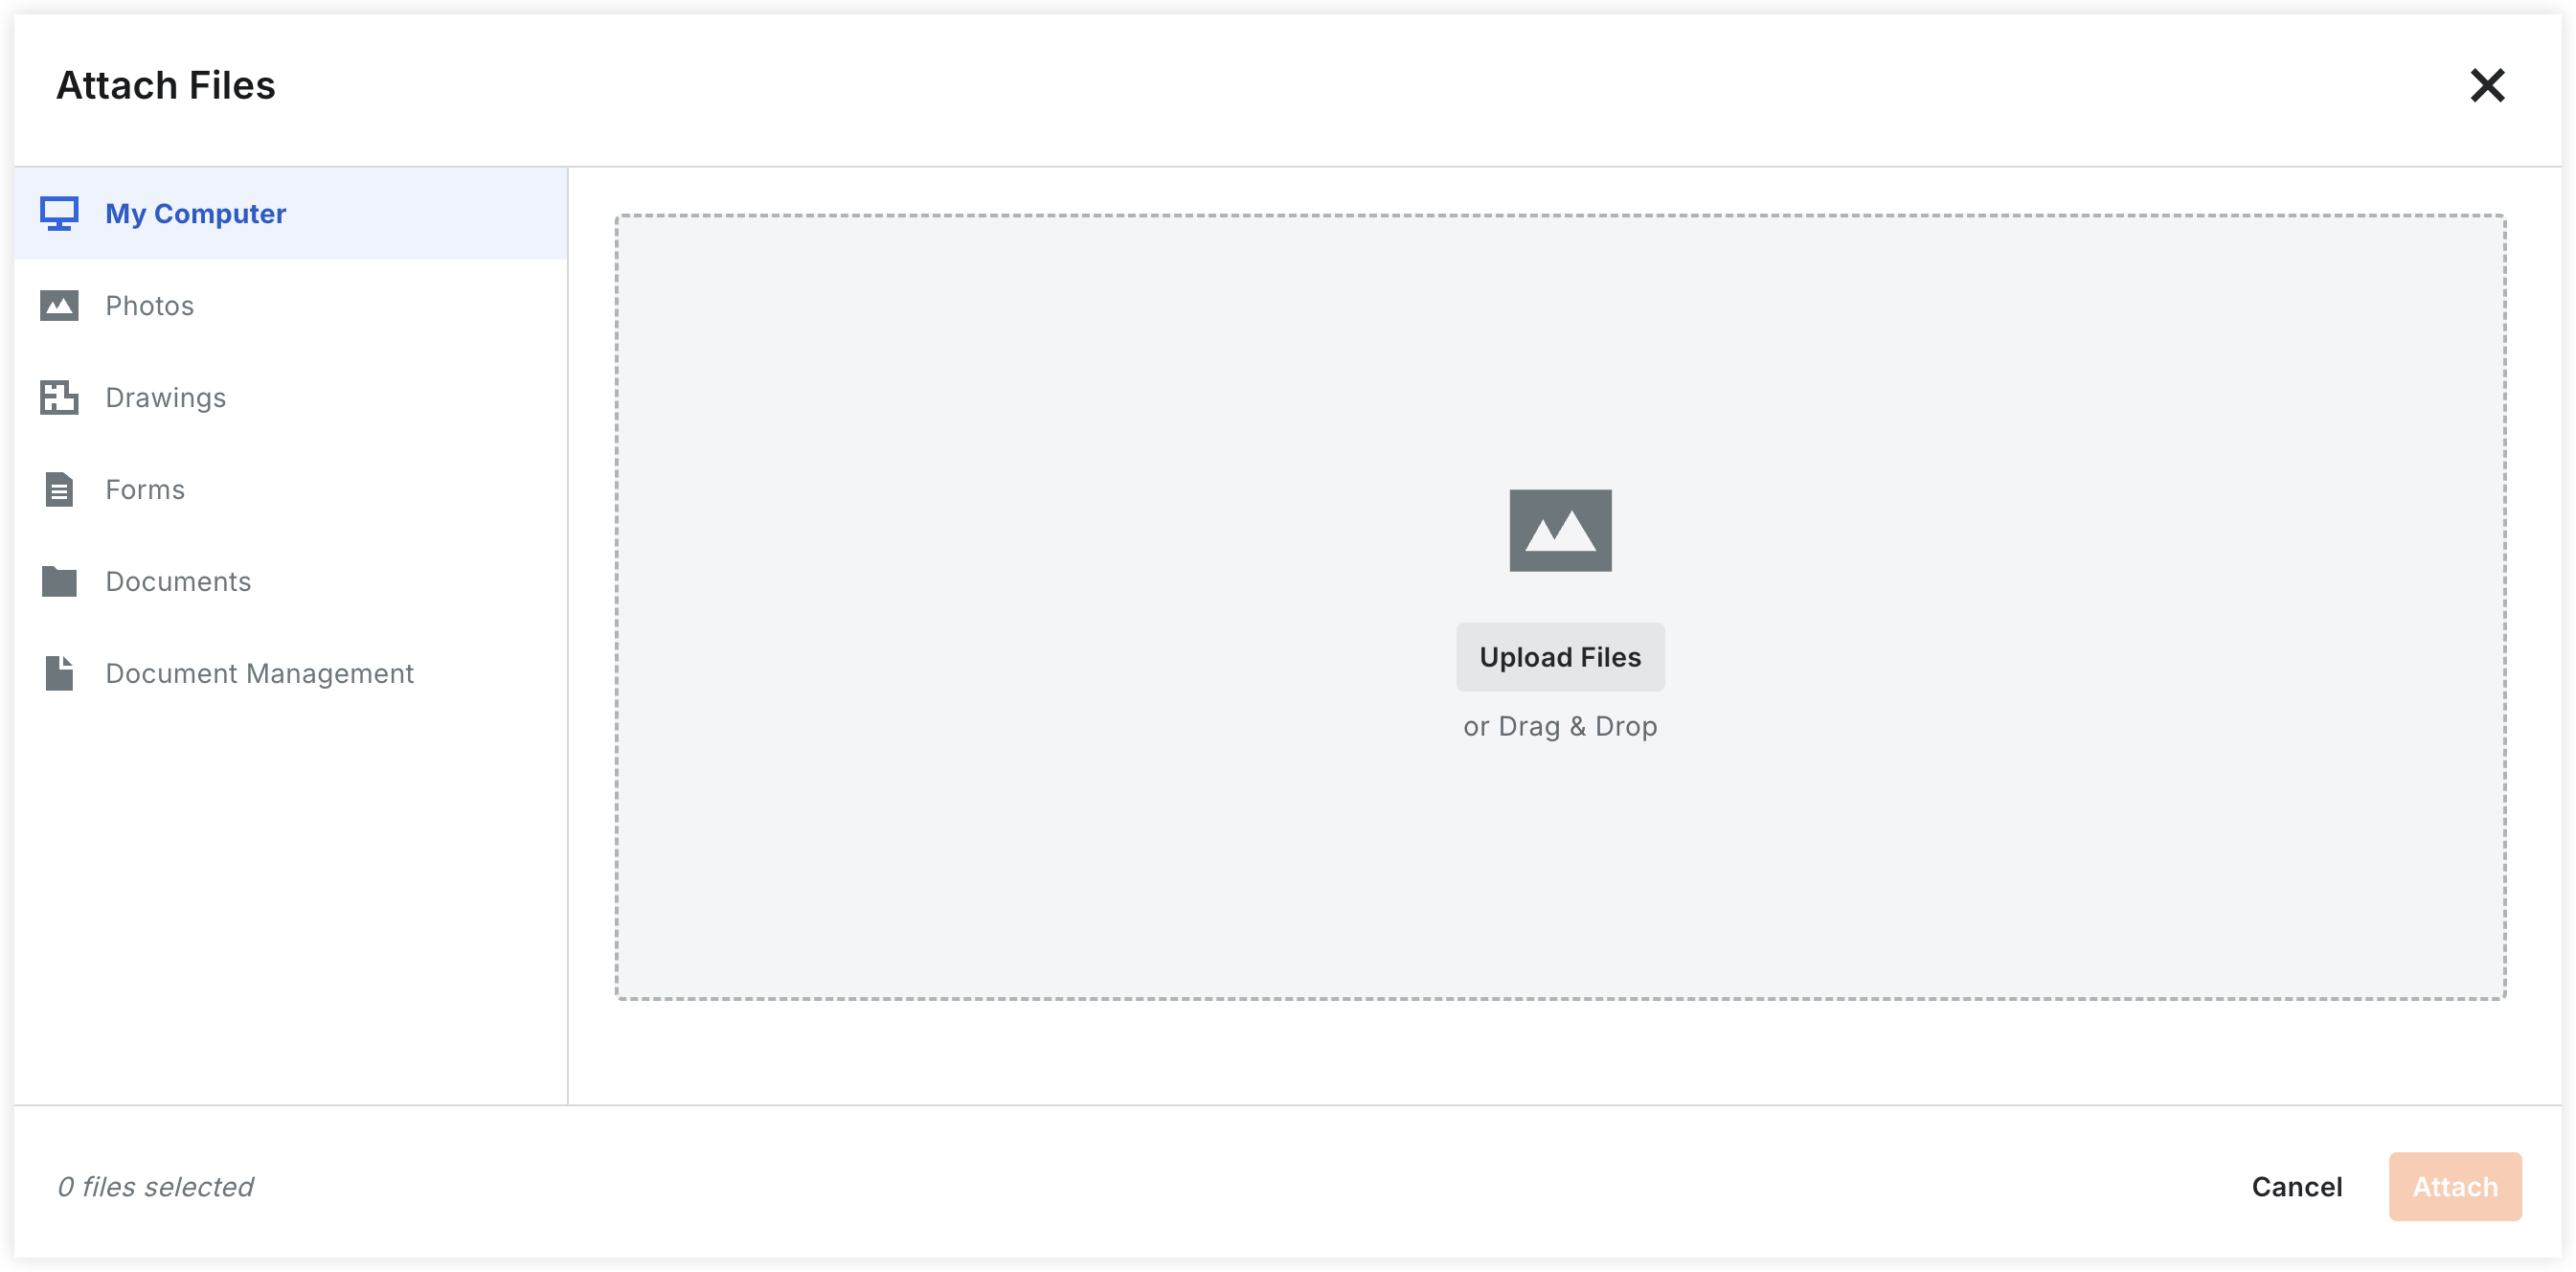
5. Anhänge hinzufügen: Klicken Sie auf Datei(en) anhängen, um das Upload-Verfahren zu öffnen. Sie können Dateien von den folgenden Speicherorten beziehen:
-
Mein Computer: Laden Sie Dateien direkt hoch oder nutzen Sie den Drag & Drop-Fläche .
-
Fotos: Hängen Sie Bilder direkt aus dem Fotos-Tool des Projekts an.
-
Zeichnungen: Verknüpfen Sie bestimmte Blätter über das Pläne-Tool .
-
Formulare: Hängen Sie ausgefüllte Formulare aus dem Formular-Tool an.
-
Dokumente: Wählen Sie Dateien aus, die bereits im Dokumente-Tool des Projekts gespeichert sind.
-
Dokumentenmanagement: Hängen Sie Dateien aus dem Dokumentenmanagement-Tool an.
6. Teilnehmer hinzufügen:
-
Wählen Sie Benutzer aus der Dropdown-Liste aus. (Benutzer müssen über die Berechtigung "Schreibgeschützt" oder höher für das Meetings-Tool verfügen, um hier angezeigt zu werden).
Hinweis: Die Auswahl von "Ja" im Feld "Protokollgenehmigung angefordert " löst einen Antwort-Workflow für den Teilnehmer aus.
7. Klicken Sie auf Erstellen und fahren Sie mit Agenda fort.
Hinweis
-
Ein Banner wird angezeigt, um zu bestätigen, dass die Besprechung erstellt wurde, und der Seitentitel ändert sich in "Besprechungsagenda für "
-
Wenn Sie Ihrer Besprechung weitere Kategorien hinzufügen möchten, siehe Eine Besprechungskategorie erstellen.
-
Wenn Sie Besprechungselemente (auch bekannt als Tagesordnungspunkte) zu Ihrer Besprechung hinzufügen möchten, siehe Besprechungselement hinzufügen.
-
Procore fügt dem Meeting automatisch eine (1) Kategorie mit dem Namen "Nicht kategorisierte Elemente" hinzu. Sie können diese Kategorie umbenennen, indem Sie den Namen überschreiben.