Ansicht der Änderungsereigniseinzelposition anzeigen
Ziel
Zur Anzeige, Organisation und Verwaltung aller Änderungsereignisse Ihres Projekts glossary-of-terms#Change_Event und Änderungsereigniseinzelpositionen.
Hintergrund
Die Registerkarte Einzelpositionen im Tool Änderungen zeigt eine Übersicht über alle Änderungsereignisse Ihres Projekts an. Auf dieser Registerkarte können Änderungsereignisse gruppiert, gefiltert, durchsucht und bearbeitet werden. Spalten können auf Grundlage vordefinierter Ansichten oder Ihrer eigenen benutzerdefinierten Konfiguration angezeigt oder ausgeblendet werden.
Wichtige Hinweise
- Erforderliche Benutzerberechtigungen:
- Berechtigungen der Stufe „Schreibgeschützt“ oder höher für das Tool Änderungen, um Informationen zu Änderungsereignissen anzuzeigen.
- Berechtigungen der Stufe „Standard“ oder höher für das Tool Änderungen, um von Ihnen erstellte Änderungsereignisse anzuzeigen und zu bearbeiten.
- Berechtigungen auf Administratorebene für das Tool Änderungen, um alle Änderungsereignisse anzuzeigen und zu bearbeiten.
- Zusätzliche Informationen:
- Die benutzerdefinierte Ansicht erscheint nur, wenn eine Bearbeitung in einer der vordefinierten Ansichten vorgenommen wurde. Die benutzerdefinierte Ansicht zeigt immer die letzte Bearbeitung an, die Sie vorgenommen haben, und ist eindeutig für jeden einzelnen Benutzer und jedes Projekt.
Voraussetzungen
Schritte
- Navigieren Sie zum Änderungen-Tool des Projekts.
- Klicken Sie auf die Registerkarte Einzelpositionen.
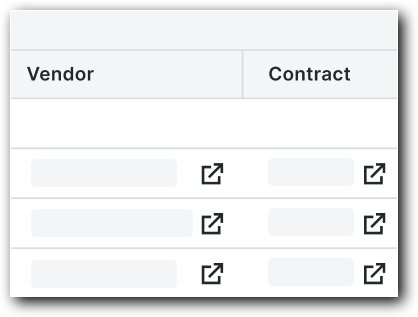
Öffnen Sie verknüpfte Elemente aus anderen Procore-Tools in einer neuen Registerkarte
Wenn Elemente aus anderen Procore-Tools sind mit einem Änderungsereignis verknüpft, Benutzer können auf das ![]() Symbol klicken, um dieses Element in einerBrowser-Registerkarte zu öffnen. Dadurchwird sichergestellt, dass die Benutzer ihren aktuellen Platz innerhalb des Tools behalten.
Symbol klicken, um dieses Element in einerBrowser-Registerkarte zu öffnen. Dadurchwird sichergestellt, dass die Benutzer ihren aktuellen Platz innerhalb des Tools behalten.

Verwendung vordefinierter Ansichten zur Anzeige von Änderungsereignissen
Wählen Sie eine vordefinierte Ansicht aus dem ersten der folgenden Dropdown-Menüs oder verwenden Sie das zweite Dropdown-Menü, um die Gruppierung der Änderungsereignisinformationen zu aktualisieren.

| Klassisches Detail | In dieser Ansicht werden Spalten angezeigt, die sich auf die Details der Änderungsereigniseinzelposition beziehen (Positionsbeschreibung, Lieferant, Vertrag, Maßeinheit). |
| Klassische Zusammenfassung | Diese Ansicht zeigt Spalten mit zusammenfassenden Informationen zu Änderungsereignissen (Status, Titel, Auftragsumfang, Typ, Grund, Ursprung) |
| Vollständige Ansicht | In dieser Ansicht können Sie alle Informationen zu Änderungsereignissen zusammen anzeigen lassen |
| Ansicht des Auftraggebers | Diese Ansicht sollte von den Kunden des Auftraggebers verwendet werden und entfernt die Umsatzspalten aus der Liste |
| Auftragsumfangsansicht | Diese Ansicht wird automatisch nach Auftragsumfang gruppiert und sortiert, damit die Benutzer leicht erkennen können, wo Nachträge zum Debitorenvertrag außerhalb der Auftragsumfangsänderungen fehlen, was ein potenzielles Risiko darstellt. |
| Temporäre Ansicht | Wenn Sie Änderungen an den vordefinierten Ansichten vornehmen, wechseln Sie automatisch zur temporären Ansicht |
über die Temporäre Ansicht
Die benutzerdefinierte Ansicht wird aktiviert, wenn Sie eine der vordefinierten Ansichten bearbeiten.Wenn Sie nach der Verwendung der benutzerdefinierten Ansicht zu einer der vordefinierten Ansichten zurückwechseln, wird die Tabelle auf die vordefinierten Konfigurationen zurückgesetzt und Ihre Änderungen in der benutzerdefinierten Ansicht gespeichert.Die benutzerdefinierte Ansicht zeigt immer die letzte Bearbeitung an, die Sie vorgenommen haben, und ist eindeutig für jeden einzelnen Benutzer und jedes Projekt.
Verwenden des Menüs 'Hinzufügen zu', um Posten aus Änderungsereignissen zu erstellen
Änderungsereigniseinzelpositionen können mit anderen Elementen in den Finanzmanagement-Tools von Procore verknüpft werden.
- Setzen Sie ein Häkchen neben die Änderungsereigniseinzelposition(en), die Sie mit einem anderen Element verknüpfen möchten.
- Optional: Klicken Sie auf Angebotsanforderungen senden, um die Seite „Anfragen senden“ zu öffnen:
Hinweis: Einzelpositionen müssen innerhalb desselben Änderungsereignisses vorhanden sein, um zusammen in eine Preisanfrage aufgenommen zu werden.- Füllen Sie die Seite „Preisanfrage senden“ wie folgt aus:
- Titel.Zeigt den Titel des Änderungsereignisses an.Überschreiben Sie den Titel nach Bedarf.
- Fälligkeitstermin.Zeigt den Fälligkeitstermin des Änderungsereignisses an.Ändern Sie dieses Datum nach Bedarf.
- Details anfordern.Zeigt den Titel des Änderungsereignisses an.Sie können dem Antrag bei Bedarf weitere Details hinzufügen.
- Verteilung.Wählen Sie die Person aus, an die Sie die Anfrage senden möchten.
- Anhänge.Klicken Sie auf Dateien anhängen oder verwenden Sie einen Drag-and-Drop-Vorgang, um der E-Mail mit der Anfrage beliebige Dateianhänge hinzuzufügen.
- Kreditorenvertrag auswählen.Zeigt den/die mit der Anfrage verbundene(n) Kreditorenvertrag/Kreditorenverträge an.Alle Informationen aus dem Kreditorenvertrag werden automatisch in der Preisanfrage-Auftragsumfangbeschreibung, dem Auftragsunternehmen, der Vertragsnummer und den Empfängern angezeigt.
- Klicken Sie auf Preisanfragen erstellen und versenden, um die Preisanfrage per E-Mail an die im Feld „Verteilung“ genannte Person zu senden.
- Lesen Sie die Meldung „Preisanfragen erstellen und versenden“ und klicken Sie auf Fortfahren.
- Füllen Sie die Seite „Preisanfrage senden“ wie folgt aus:
- Klicken Sie auf Hinzufügen zu und wählen Sie eine der folgenden Optionen:
- Sekundärvertrag
- Neue Bestellung
- Neuer Unterauftrag
- Link zu bestehendem Kreditorenvertrag
- Nachtrag zum Kreditorenvertrag/Potenzieller Nachtrag
- Neuer Änderungsauftrag für Sekundärvertrag/Potenzieller Änderungsauftrag
- Link zu bestehendem Änderungsauftrag für Sekundärvertrag/Potenzieller Änderungsauftrag
- Änderungsauftrag für Primärvertrag/Potenzieller Änderungsauftrag
- Neuer Änderungsauftrag für Primärvertrag/potenzieller Änderungsauftrag
- Link zu bestehendem Änderungsauftrag für Primärvertrag/potenziellem Änderungsauftrag
- Budgetanpassungen
- Neue Budgetänderung
- Link zur bestehenden Budgetänderung
- Sekundärvertrag
Änderungsereignisse bearbeiten
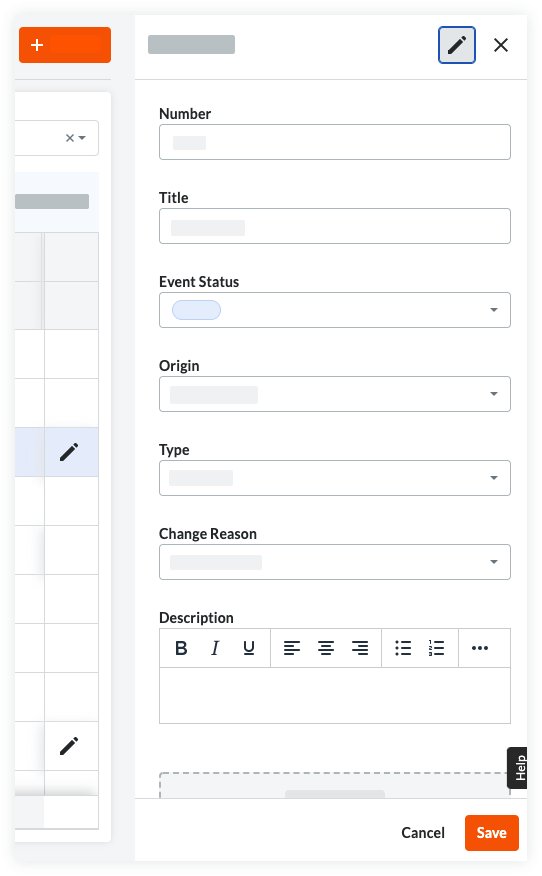
So aktualisieren Sie ein Änderungsereignis in der Listenansicht 'Einzelposten' des Tools Änderungen:
- Klicken Sie auf das Symbol
 'Bearbeiten' neben der Einzelposition des Änderungsereignisses für das Änderungsereignis, das Sie aktualisieren möchten.
 - Aktualisieren oder überprüfen Sie die Informationen für das Änderungsereignis wie gewünscht.
- Klicken Sie auf Speichern, wenn Sie fertig sind, oder Abbrechen, um alle Änderungen zu verwerfen.

Spalten konfigurieren
Klicken Sie auf das Symbol 'Tabelleneinstellungen' ![]() , um das Menü für die Konfiguration der Zeilenhöhe und der Spalten zu öffnen.
, um das Menü für die Konfiguration der Zeilenhöhe und der Spalten zu öffnen.
- Zeilenhöhe:
- Wählen Sie zwischen kleiner, mittlerer und großer Zeilenhöhe für die Listenansicht der Änderungsereignisse.
- Spalten konfigurieren:
- Verwenden Sie den Kippschalter, um festzulegen, welche Spalten in der Listenansicht der Änderungsereignisse angezeigt oder ausgeblendet werden sollen.
- Wenn Sie auf Auf Standard zurücksetzen klicken, werden alle Spalten angezeigt.
Filtern der Einzelpostenansicht
Klicken Sie auf die Schaltfläche Filter neben der Suchleiste am oberen Rand der Tabelle mit den Änderungsereignissen.

Wählen Sie aus den folgenden Filtern:
Hinweis
*Die mit einem Sternchen (*) gekennzeichneten Filteroptionen ermöglichen es Ihnen, Parameter als Zahlenwerte festzulegen. Die folgenden Parameter können eingestellt werden:
- Beliebiger Wert
- Ist zwischen
- Ist größer als
- Ist größer als oder gleich
- Ist kleiner als
- Ist kleiner als oder gleich
- Kein Wert
|
|
Gruppierung von Spalten
Mit der Spaltengruppierung können Sie die Tabelle der Änderungs-Einzelposten besser organisieren. Geben Sie an, welche Spalten Sie gruppieren möchten, und die Posten innerhalb dieser Gruppe werden darunter aufgerollt.
Beispiel
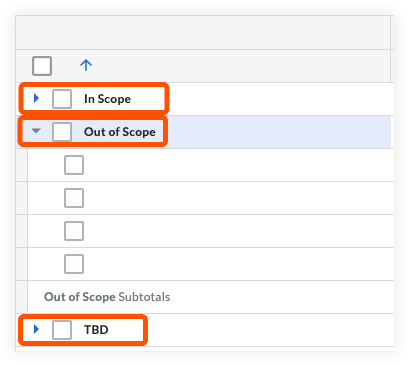
Sie können die Änderungsereignisse nach Umfang gruppieren. In diesem Beispiel wurde die Spalte Umfang auf die linke Seite der Tabelle verschoben und die einzelnen Änderungs-Einzelposten wurden in die Gruppen der jeweiligen Umfänge eingeordnet.

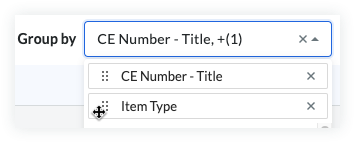
Um Spalten zu gruppieren, klicken Sie oben in der Änderungsereignistabelle auf den Selektor Gruppieren nach und wählen Sie die Spalten aus, die Sie gruppieren möchten.

Wenn mehr als eine Gruppierung ausgewählt ist, können sie innerhalb der Auswahl 'Gruppieren nach' neu angeordnet werden, indem sie angeklickt und in die gewünschte Reihenfolge gezogen werden. Eine Gruppe kann gelöscht werden, indem Sie auf das 'x' auf der rechten Seite der Gruppe klicken.

Spalten neu anordnen
Klicken und ziehen Sie die Spaltentitel, um ihre Position in der Tabelle nach links oder rechts zu verschieben.

Klicken Sie auf die vertikale Ellipse ![]() , wenn Sie den Mauszeiger über eine Spaltenüberschrift/einen Spaltentitel bewegen, um weitere Spalteneinstellungen zu öffnen:
, wenn Sie den Mauszeiger über eine Spaltenüberschrift/einen Spaltentitel bewegen, um weitere Spalteneinstellungen zu öffnen:
- Gruppieren nach
- Pin-Spalte
- Links anheften
- Rechts anheften
- Größe dieser Spalte automatisch anpassen
- Alle Spalten automatisch anpassen
- Spalten zurücksetzen

