Erweiterte Einstellungen konfigurieren: E-Mails
Ziel
Erweiterte Einstellungen für das E-Mails-Tool des Projekts konfigurieren.
Wichtige Hinweise
- Erforderliche Benutzerberechtigungen:
- Berechtigungen der Stufe "Admin" für das E-Mail-Tool des Projekts.
- Einschränkungen:
- Wenn Sie Benutzerberechtigungen konfigurieren, wie unter Festlegen von Benutzerberechtigungen für das E-Mail-Tool unten beschrieben, sind Sie nicht berechtigt, Einstellungen für Benutzer zu ändern, die mit einer Berechtigungsvorlage verknüpft sind. Siehe stattdessen Vorlagen für Projektberechtigungen verwalten.
- Eine Liste, was Benutzer jeder Berechtigungsstufe in E-Mails tun können, finden Sie in der Berechtigungsmatrix.
- Zusätzliche Informationen:
- Wenn ein Benutzer mit der Berechtigung „Admin“ für das E-Mails-Tool des Projekts eine Standard-Verteilerliste erstellt, erhalten die Mitglieder dieser Liste alle Nachrichten, die im E-Mails-Tool Ihres Projekts erstellt und gesendet oder über die eingehende E-Mail-Adresse an das E-Mails-Tool gesendet wurden. Dazu gehören alle Nachrichten, die mit „Privat“ gekennzeichnet sind.
Schritte
Mit den unten aufgeführten Schritten können Sie die folgenden erweiterten Einstellungen für das E-Mails-Tool konfigurieren:
- Die Einstellungen des E-Mails-Tools konfigurieren
- Benutzerberechtigungen für das E-Mails-Tool festlegen
Die Einstellungen des E-Mails-Tools konfigurieren
- Navigieren Sie zum E-Mails-Tool des Projekts.
Daraufhin wird die Seite „E-Mails“ angezeigt. - Klicken Sie auf das Symbol Einstellungen
 konfigurieren.
Daraufhin wird die Seite "E-Mail-Einstellungen" angezeigt.
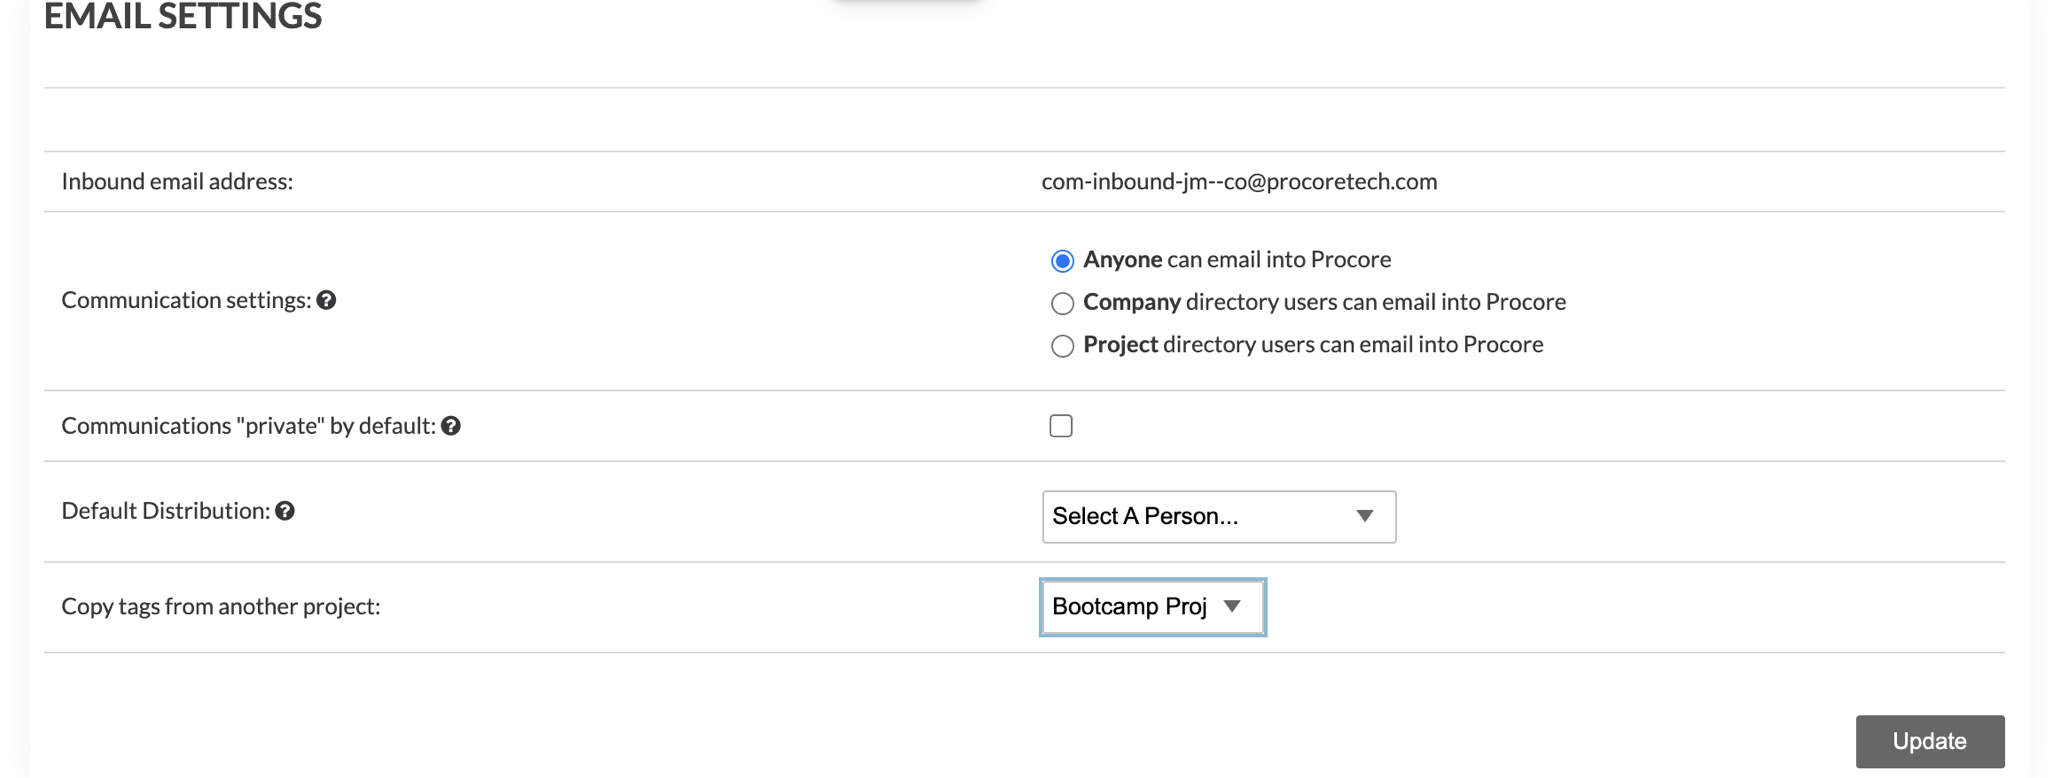
- üllen Sie die folgenden Dateneinträge aus:
-
Klicken Sie auf Aktualisieren.
Dadurch werden Ihre Konfigurationseinstellungen gespeichert.
Benutzerberechtigungen für das E-Mails-Tool festlegen
- Rufen Sie das Tool E-Mails des Projekts auf.
- Klicken Sie auf das Symbol Einstellungen konfigurieren.
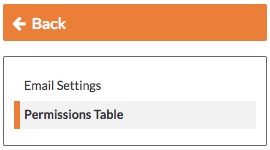
- Klicken Sie im rechten Fensterbereich auf Berechtigungstabelle.
- Wählen Sie aus diesen Optionen:
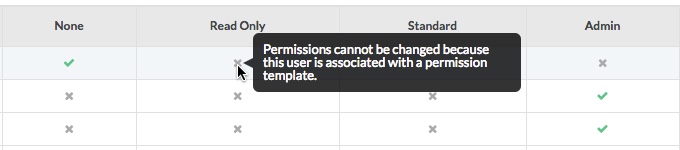
- Wenn ein Benutzer KEINER Berechtigungsvorlage zugeordnet ist, können Sie dessen Berechtigung für das E-Mails-Tool ändern, indem Sie auf die Spalte „Keine“, „Nur Lesen“, „Standard“ oder „Admin“ klicken, bis eines dieser Symbole angezeigt wird:
 Zugriff. Ein GRÜNES Häkchen zeigt an, dass dem Benutzer eine Zugriffsberechtigung erteilt wurde.
  Kein Zugriff. Ein ROTES Häkchen zeigt an, dass dem Benutzer KEINE Zugriffsberechtigung erteilt wurde.

- Hinweise:
- Wenn ein Benutzer über die "Admin"-Berechtigung für das Unternehmensadressbuch verfügt, können Sie die Zugriffsberechtigung dieser Benutzer nicht über das E-Mail-Tool ändern.

- Wenn ein Benutzer mit einer Berechtigungsvorlage verknüpft ist, dürfen Sie die Zugriffsberechtigung dieses Benutzers nicht über das E-Mail-Tool ändern. Siehe Vorlagen für Projektberechtigungen verwalten.
- Wenn ein Benutzer über die "Admin"-Berechtigung für das Unternehmensadressbuch verfügt, können Sie die Zugriffsberechtigung dieser Benutzer nicht über das E-Mail-Tool ändern.
- Wenn ein Benutzer KEINER Berechtigungsvorlage zugeordnet ist, können Sie dessen Berechtigung für das E-Mails-Tool ändern, indem Sie auf die Spalte „Keine“, „Nur Lesen“, „Standard“ oder „Admin“ klicken, bis eines dieser Symbole angezeigt wird:
- Wenn Sie fertig sind, klicken Sie auf Zurück, um zum E-Mails-Tool zurückzukehren.
Ihre Änderungen der Benutzerberechtigungen werden automatisch gespeichert.
If you would like to learn more about Procore's email management software and how it can help your business, please visit our construction email management software product page  .
.